Vendor API flow overview
Before you start integrating your app with Setapp via Vendor API, you might want to know what the entire flow looks like. We hope this article will bring more clarity.
Check out our detailed diagram on iOS flow integrated via Vendor API. If you have any questions, don't hesitate to contact your Developer Support Representative.
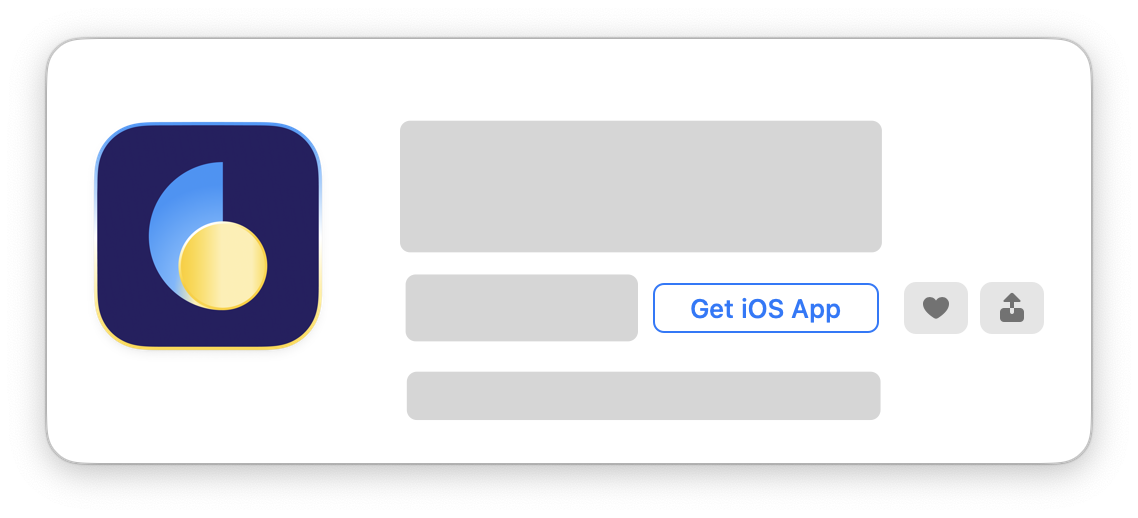
- The user goes to the app page on Setapp desktop and clicks "Get iOS App" for iOS apps or "Get Web App" for the web apps.
- The user scans the first QR code with the native phone camera.
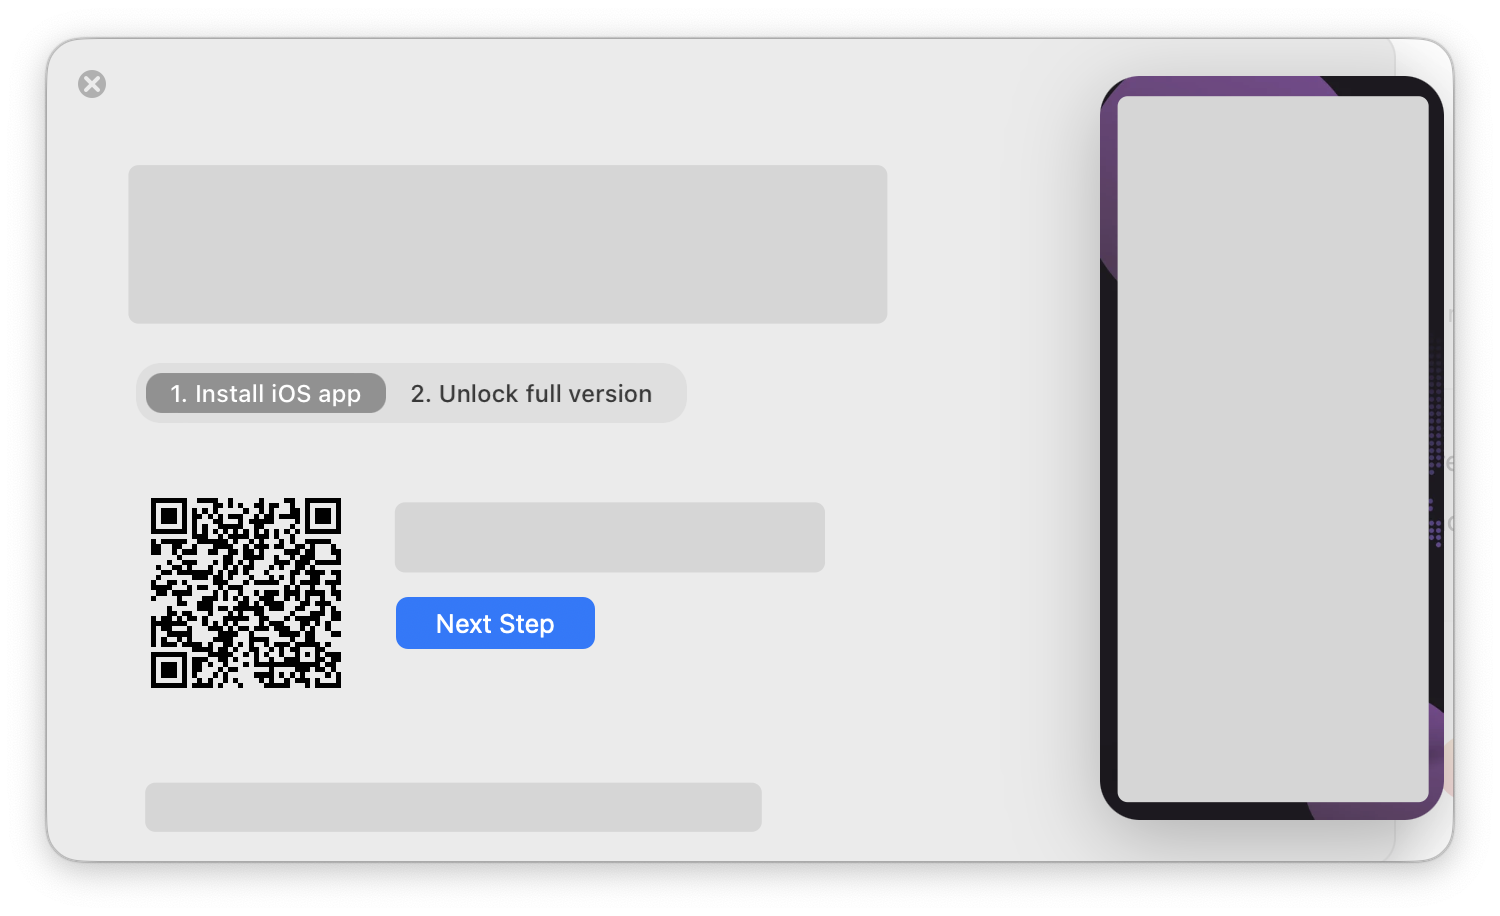
- The user is redirected to App Store and must install the app.

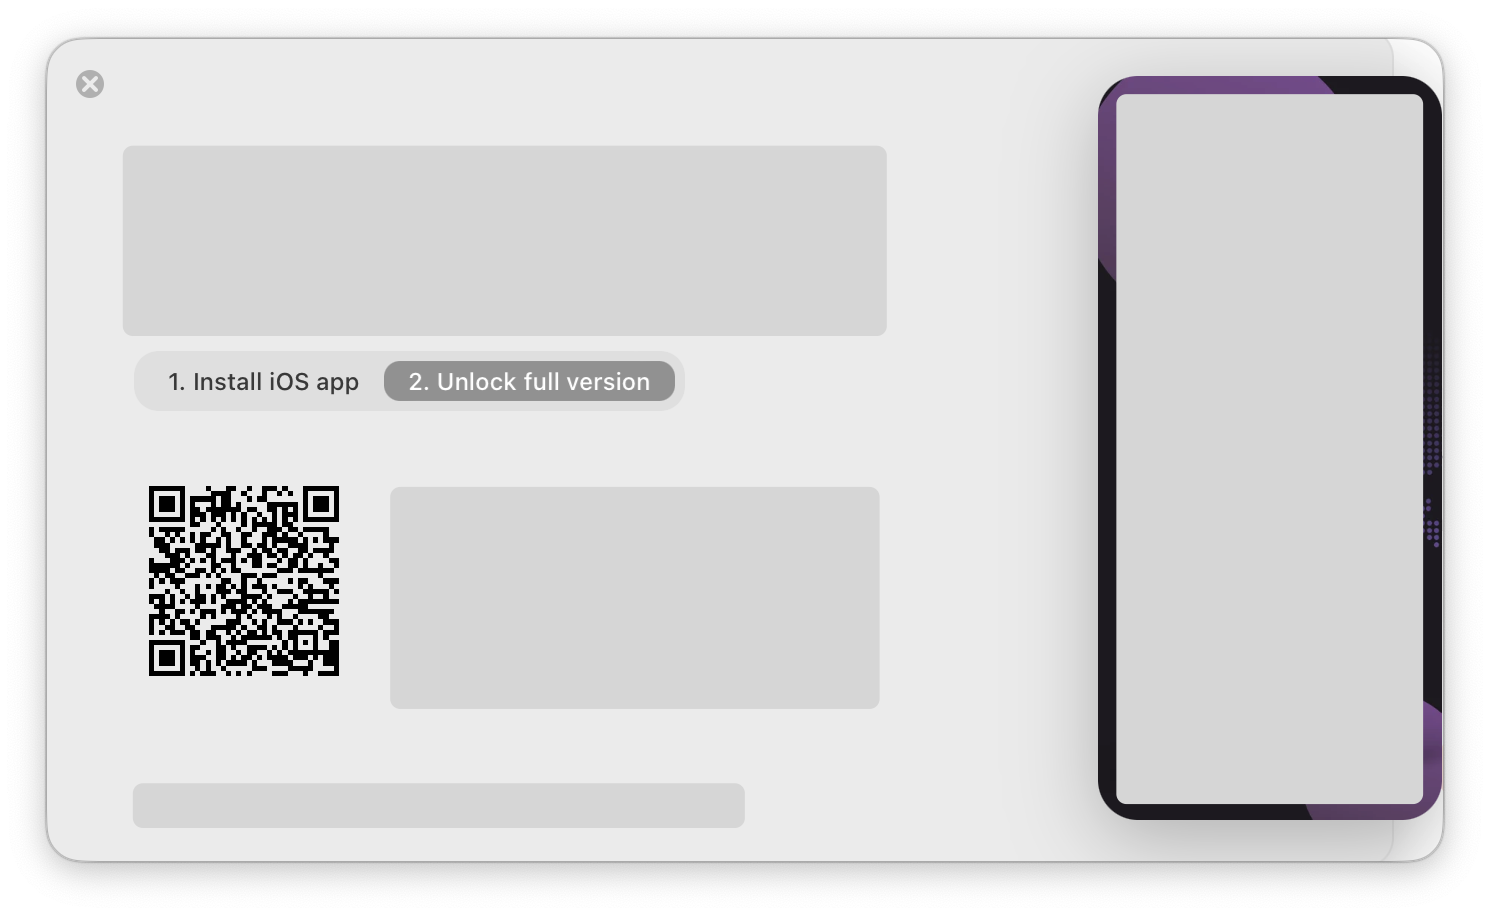
- The user goes back to Setapp and scans the second QR code. Your app is opened by
app.url.scheme://ios.setapp.com/unlock.
- The user sees the "Sign in with Setapp" button (the label might differ) and clicks it.
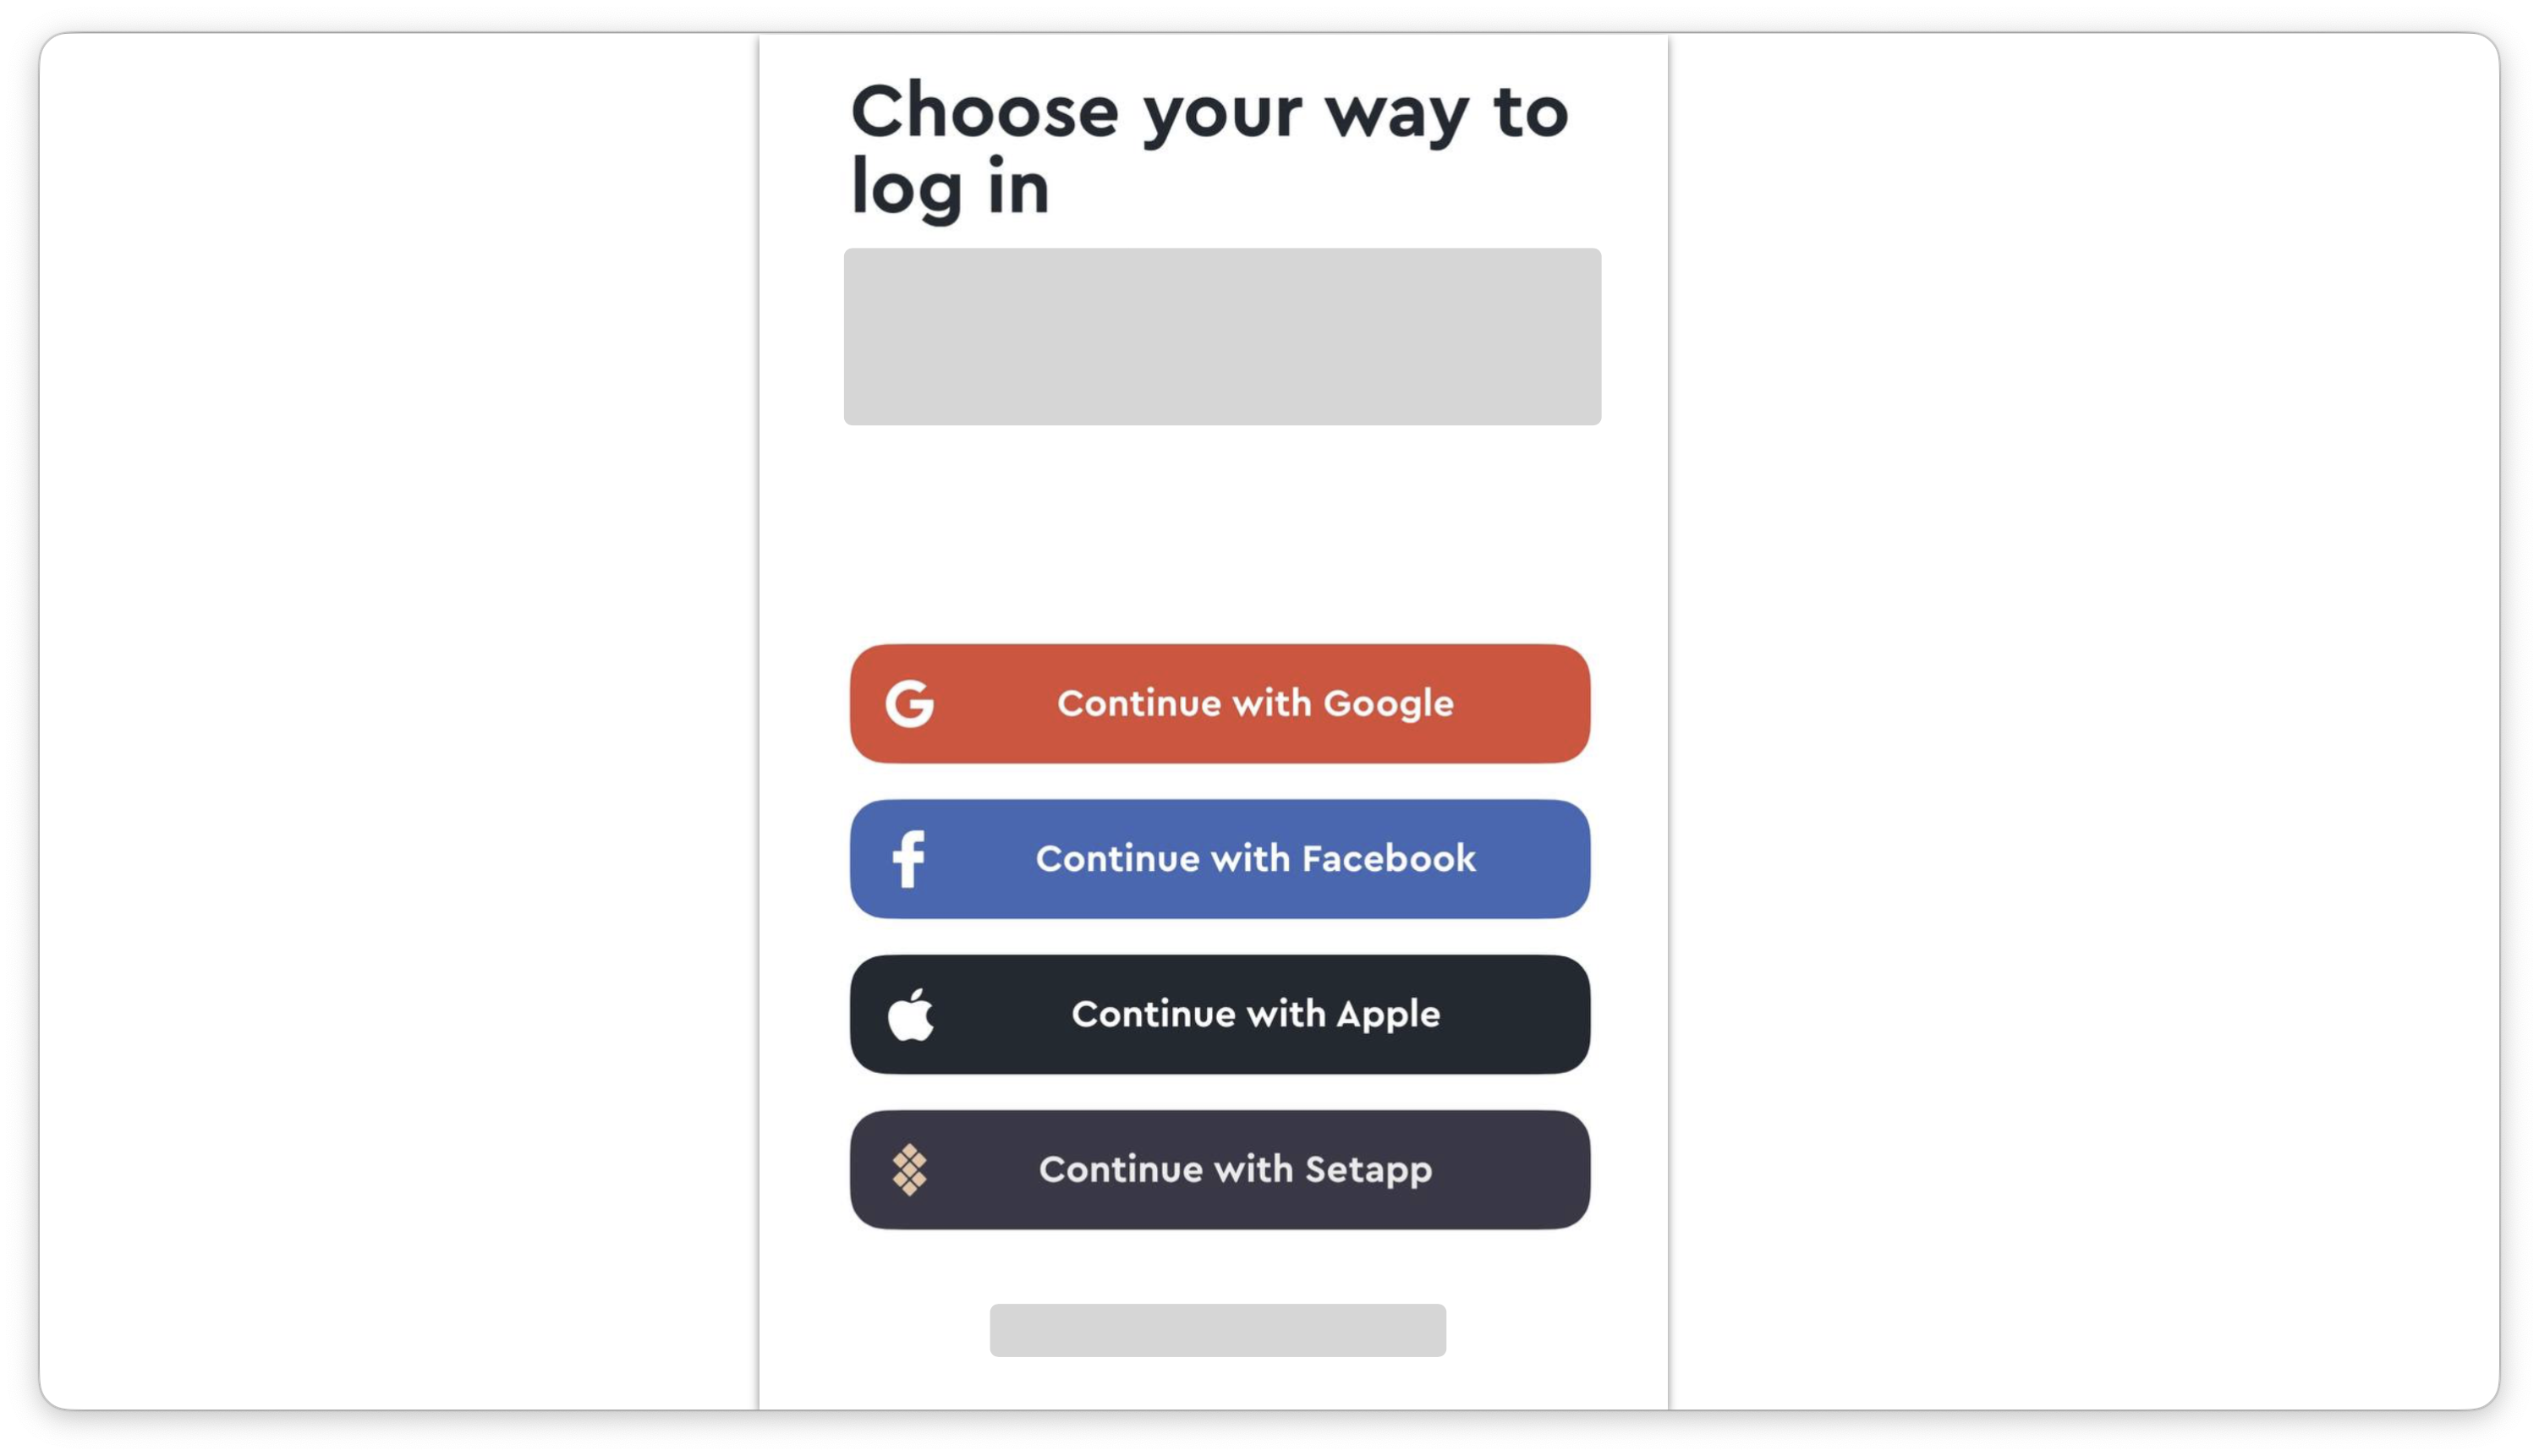
- Your app redirects the user to Setapp, where they must enter their Setapp credentials.
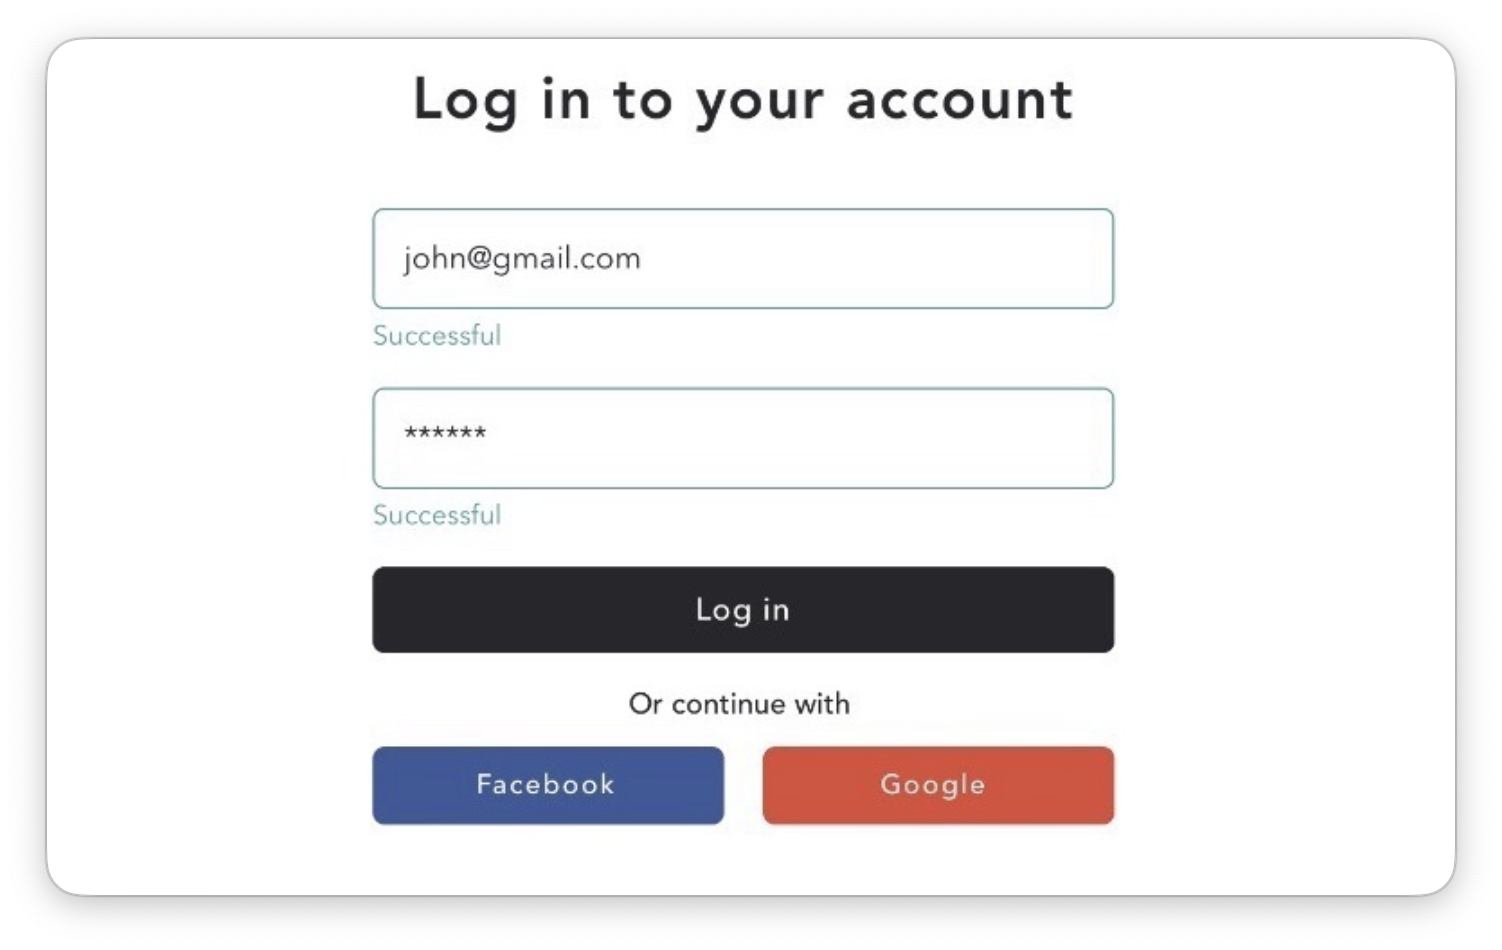
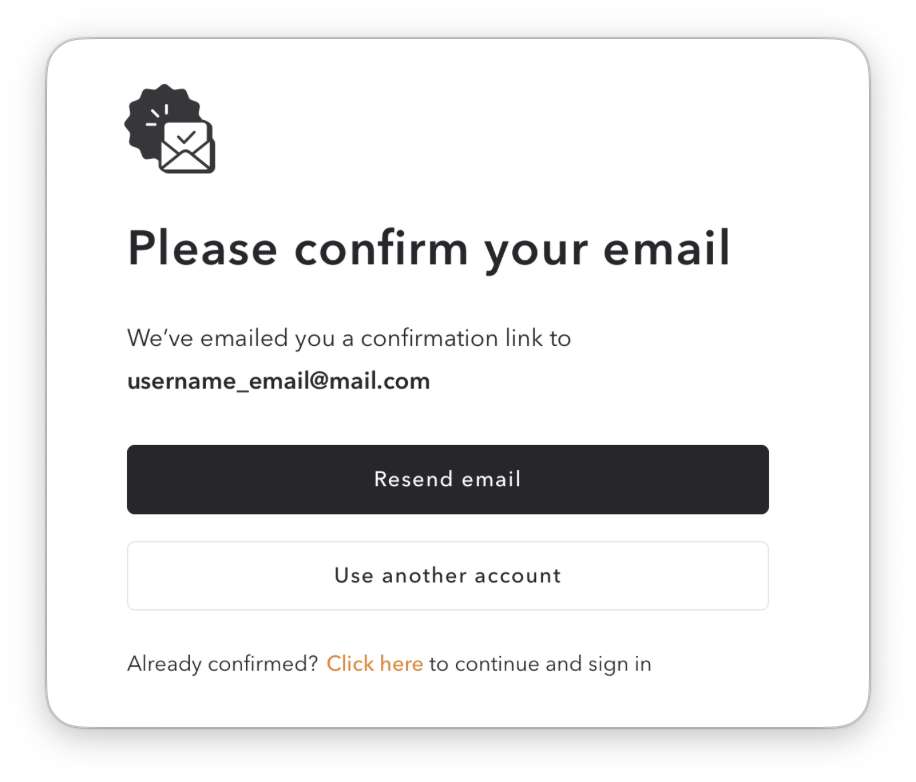
Note: Here, we check whether a user has confirmed their email. If not, we suggest resending the confirmation link and waiting until the user confirms the email.
- User grants access to the app by clicking the Authorize button or declines access by clicking the Cancel button.
- Setapp redirects the user to your app again, attaching an auth code to the app Redirect URL.
- Your app exchanges the auth code with access & refresh tokens. Then your app uses the token to request the user's email.
- Your app creates a user account and connects it with Setapp.
- Your app validates the user's subscription via the backend. See Access client's app API to implement this step.
- The user is signed in, and your app notifies about successful signing in. The user can now use your app.
- Your app sends the usage report. See Report app usage to implement this step.
Updated over 1 year ago
Did this page help you?