Submitting apps for review
Learn the steps to start your review
Submit your macOS app
Check your app bundle
Before submitting an app for review, make sure the bundle meets these requirements:
- The bundle size does not exceed 1 GB.
- In relation to the .zip archive with the app bundle, the app must be located either:
- In the root directory:
<FileName>.zip/<AppName>.app, or - In a single directory, nested under the root directory:
<FileName>.zip/<DirectoryName>/<AppName>.app
- In the root directory:
- The bundle ID of the app that's being submitted must match the required Setapp pattern; for a new app version, the ID must be the same as in the previous versions.
- The
Info.plistfile in your app bundle must include these key-value pairs:- CFBundleIdentifier
- CFBundleName
- CFBundleIconFile
- CFBundleVersion
- CFBundleShortVersionString
- NSUpdateSecurityPolicy. Find more details here.
- Place the app icon as a PNG file in the directory where your app bundle (
<AppName>.app) is located.
<FileName>.zip
├── <AppName>.app
└── AppIcon.png<FileName>.zip
└── <DirectoryName>
├── <AppName>.app
└── AppIcon.png
Verify archive structure before submission
Before uploading your app archive, ensure its structure is correct and does not contain unnecessary hidden files. When unpacked, the archive must contain a single root directory with your <AppName>.app bundle inside — without any extra metadata folders such as __MACOSX.
To verify this, you can test the archive locally by unpacking it with the command below:
/usr/bin/ditto -x -k <FileName>.zip <DestinationFolder>Then check that the extracted structure contains your app bundle in one directory (for example, <DestinationFolder>/<AppName>.app) and no additional folders.
If you see a directory named __MACOSX, it means your archive was packed incorrectly and should be recreated before uploading. This ensures Setapp can correctly process your app during validation and staging.
Tip
Avoid compressing the app bundle from Finder’s context menu, as it may include hidden metadata folders. Instead, create the archive using a verified command-line method or a packaging tool that maintains a clean structure.
Note
App notarization is required.
Requirements for the icon
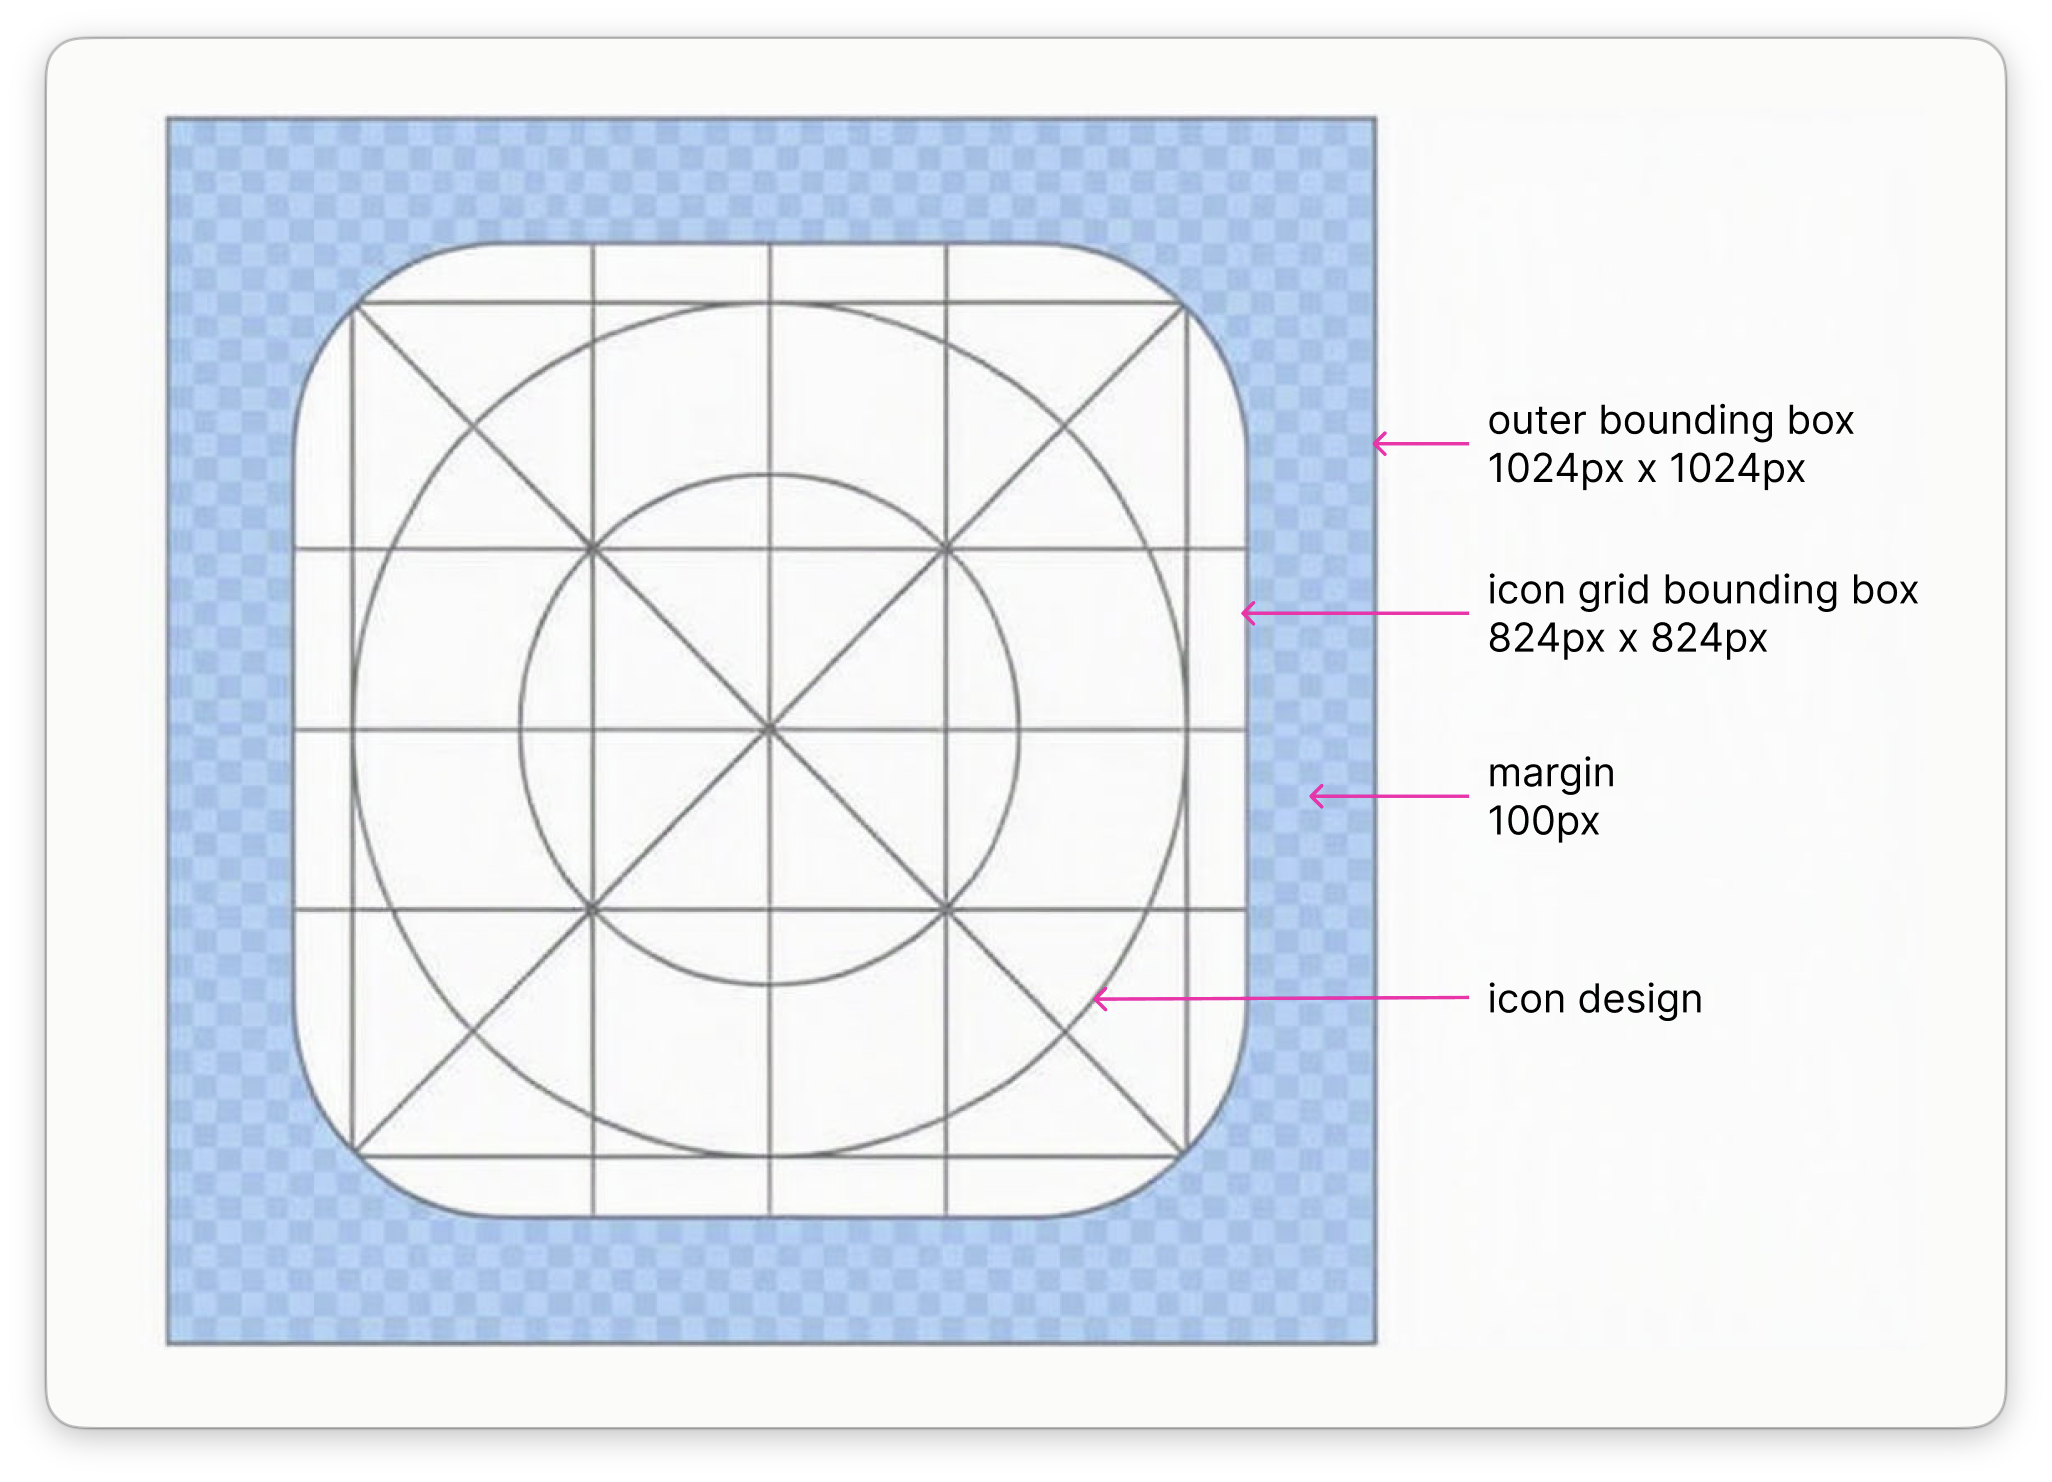
We follow Apple standards to make icons look authentic within macOS or iOS environments. You’re welcome to use Apple’s Icon Composer app to easily create your own icon. Apple also provides ready-made templates for creating icons on its platform. To get a 1024 x 1024 pixels template, download "Production Templates" for macOS here.
These are our key requirements:
- The icon's size is 1024 x 1024 pixels.
- Set a 100-pixel margin and place your icon design within an 824 x 824-pixel frame.
- Curve the corners of the icon design.
Troubleshooting: Xcode 14 cannot extract icons bigger than 256 x 256
Setapp requires app icons at 1024x1024 pixels, but Xcode cannot support this resolution with its default settings. To fix this:
- Go to Build Settings > Asset Catalog Compiler - Options
- Set
Standalone Icon File BehaviourtoAll
In case you use the config file, set ASSETCATALOG_COMPILER_STANDALONE_ICON_BEHAVIOR to All. You can find more information about this option here.

- The ICNS package, specified in the
CFBundleIconFilekey, may contain icons that have a resolution lower than 512 pixels.\
Now that you have verified your app for compatibility with the Setapp guidelines and prepared a release version that meets the bundle requirements, it’s about time to submit the app.
Build upload
You can upload builds automatically or manually.
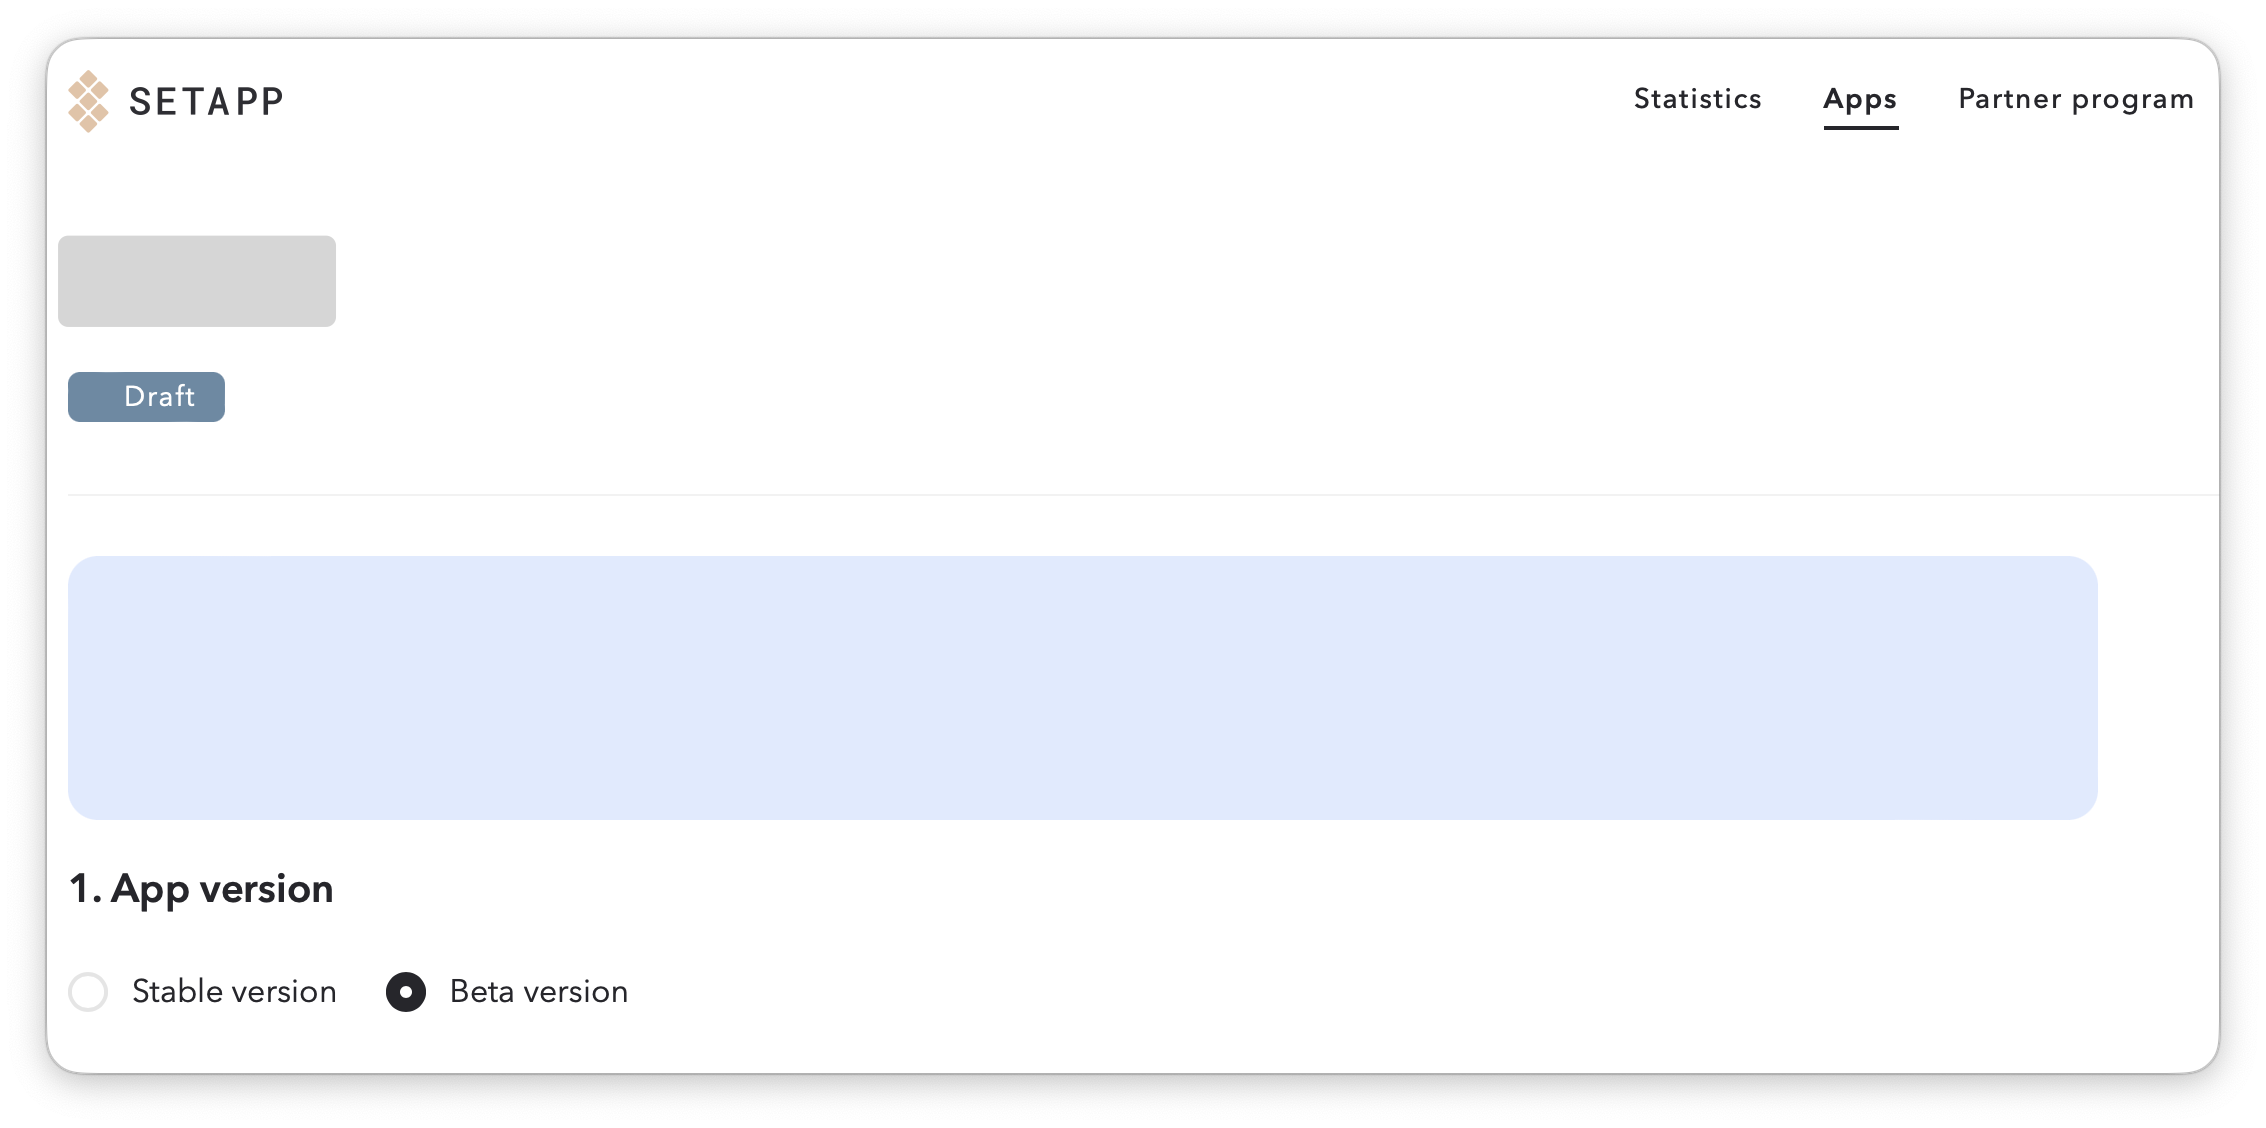
Additionally to a stable version, you can upload a beta version of your app. Some users in Setapp agreed to test beta versions of the apps. Ratings and reviews are not available to users using a beta. Read more about this functionality in our User Guide. Also, read how the "Draft" and "Live" statuses apply to beta.
Use this chance to try out new features in your app and get feedback on them.
Automatic build upload
There are multiple ways for continuous integration (CI) in Setapp. You can choose the most suitable way to upload the newest build of your app. In Setapp, we provide three ways to upload the build automatically:
- API. Find and test the API on our page API to upload app build automatically.
- Script. Use our script template to compose your own script.
- Fastlane Plug-in. The advantage of this approach is that you configure the plug-in once, then reuse it multiple times to upload the build with one click. We use Fastlane as a tool for the plug-in. Read more about how to configure the plug-in here.
To configure one of the ways, use the following parameters:
- Token — Enter the Setapp Automation token of your app. Please request the token from your Developer Support Representative. Later, we'll implement the ability to generate the token in your developer account.
- Archive — Create an archive with a new bundle version.
- Release_notes — Enter a string that contains release notes for a new version.
- Status — Define the status for the build once it is uploaded:
draftorreview. - Release_on_approval — Define how to publish the build after its approval. Enter
trueto publish automatically, and enterfalseto publish manually. - Is_beta — Enter
trueif you upload the beta version of your app. Enterfalseif you upload a stable version of your app. - Allow_overwrite — Enter
trueto overwrite the existing build, which is waiting for review. Enterfalseto prohibit building overwriting.
When Setapp validates the new version, it returns one of these response codes:
- 204 — Uploaded successfully
- 401 — Authorization has failed
- 400 — Validation error and details description in response.
Limitations to automatic build uploadPlease mind the following:
- You must upload the very first version of an app via Web UI.
- You cannot update the description, media files, and some other meta information using automatic build upload. However, you can create a draft bundle via CI and then fill in the missing data on the Web.
- You can not reupload your build via CI if it's on review. However, you can upload a new build manually in your developer account and it will override the build sent via CI.
Manual build upload
-
Go to the Apps tab of the developer account and click Add First Version/Add New Version.
You'll need to enter your app bundle ID if you click the button for the first time.
-
Drag & drop a .zip app bundle to the Build area of the Edit Version page.
Right after that, we’re automatically checking the version of the Setapp Library integrated into the bundle. If the version is outdated, you’ll see a warning message with a link to download the latest version. However, you may choose to proceed with the outdated Library — but during the review, we’ll ask you to provide a reason for doing so.
Submit your app: rest of the steps
Use the form on the Edit Version page to provide Setapp users with information about your app.
Markdown formatting in release infoThe Markdown markup language is only supported for the “Release notes” field. You can use the formatting bar or insert the native Markdown syntax elements.
For other fields with metadata, please use plain text and don’t add special characters.
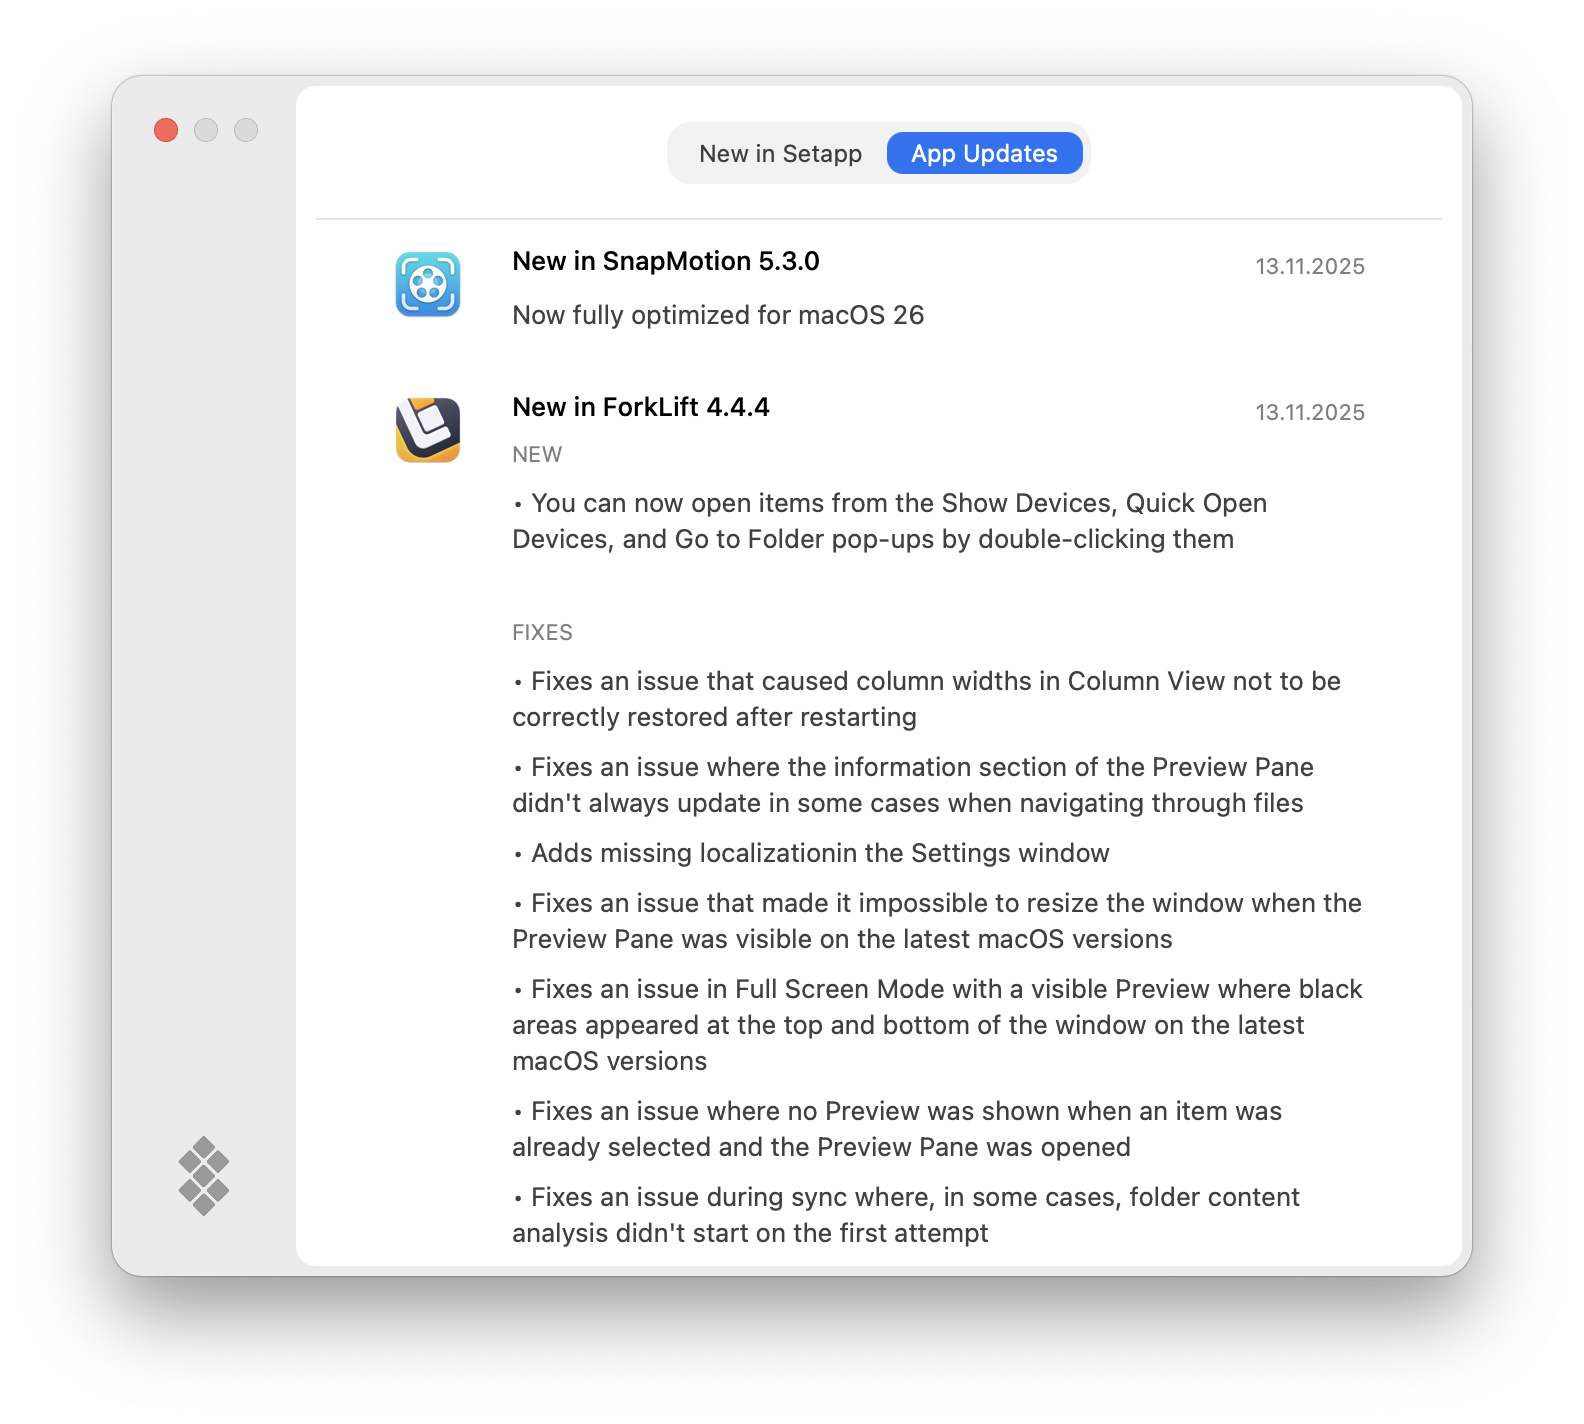
Release notes
An overview of the app's new features, improvements, and fixes in the current update. Markdown formatting is supported. Limited to 5000 characters.
We aim to keep release notes clear and consistent. Since Setapp users view all updates on one page, we have prepared Release notes template for developer apps.
Key benefits
This is a brief description of the key function of your app. Please note that this text is for internal use only to help our team categorize your app and will not be published on Setapp. Limited to 80 characters.
Description
You can easily generate the best description for your app using our instructions and prompts. Please see App description prompt for more details.
Remember about the 3000-character limit.
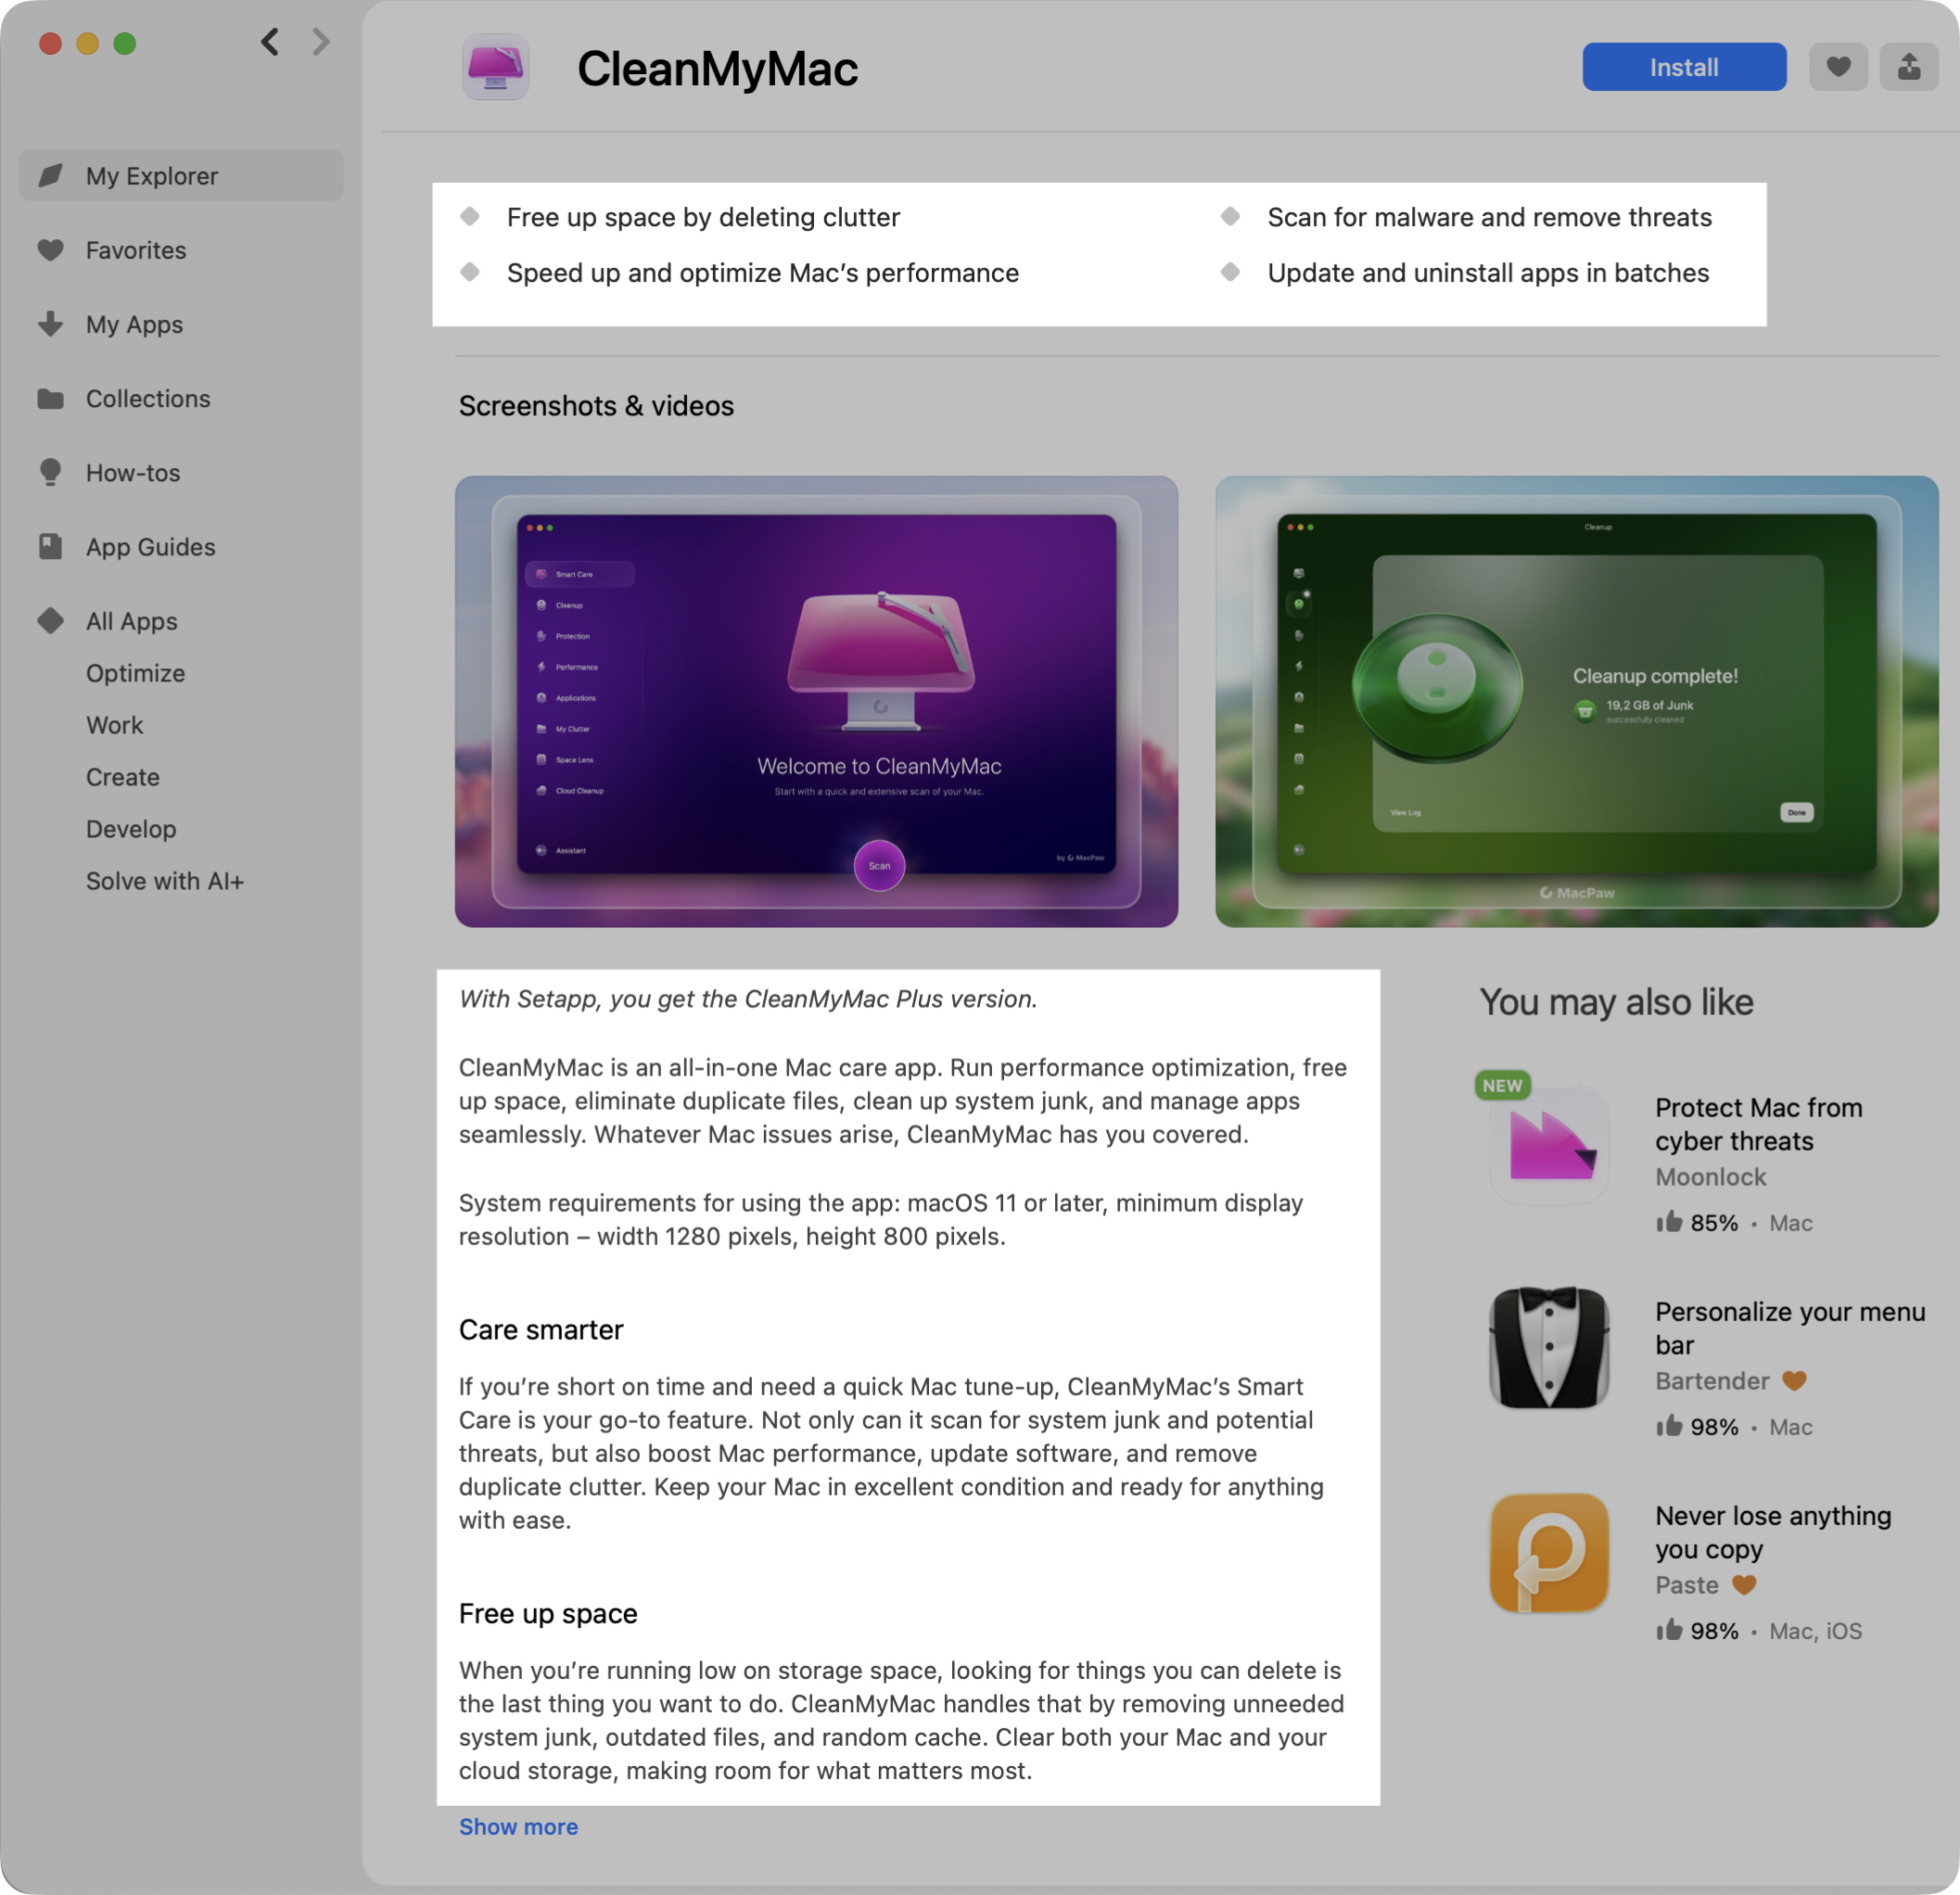
Screenshots
Screenshots that reveal the advantages and exceptional design of your app. We support drag-and-drop for uploading and arranging screenshots.
- Place the screenshots in the order you'd like users to see them;
- Add only actual screenshots of the app without embellishing it or displaying non-existent features;
- Make sure fonts and text style fit well if you add captions to your screenshots;
- Don't show any content without the legal right to do so.
macOS apps
Upload up to 5 screenshots in .jpg or .png. The ratio is 16:10. The minimum size is 1280 x 800 pixels.
iOS apps
Upload 5 to 10 screenshots in .jpg or .png format. The minimum size is 1242 x 2688 pixels.
Video
Promo, tutorial, or any other video that, in your opinion, best presents or explains your app.
You can upload 1 video for your app. Technical requirements are the following:
- Supported formats and codecs: MP4, H.264.
- The recommended aspect ratio is 16:10 (same as for screenshots).
- Playback time: no longer than 2 minutes.
- File size: up to 100 Mb.
To create a new thumbnail for your video, click the shutter icon in the center of the player when the video reaches the needed frame.
Support URL
A link to the webpage with user support information, FAQs, the knowledge base, etc.
Promo URL
A link to a website, webpage, or landing page that contains information about your product.
Comments for the review team
A message you can send to the Setapp review team. Users will not see it. Limited to 2000 characters.
We use the submitted data to create an individual app preview screen in the Setapp desktop client. Users see it when they click on the app name in the list of available apps in the Setapp window. Therefore, we urge you to focus on the most distinctive features of the app and prepare impressive screenshots.
Setapp also uses the following information from your app bundle for the creation of a preview screen:
| Data | Description |
|---|---|
| App name | Added to release details automatically, based on the data specified during registration in Setapp. Note that an app name must not include an app version. |
| Version | Extracted from the app bundle you submit. |
| Keywords for Spotlight | Extracted from the app bundle. Setapp uses keywords specified in the app's Info.plist (the MDItemKeywords key) to show your app in Spotlight search results. As keywords, you can specify the types of tasks performed, supported file formats, and so on. Note that the keywords must conform to the app you submit.Find out more about how to add keywords here. |
Note
Logo, icons, screenshots and description must conform with the app you submit.
-
When you finish editing, you can either submit the app for review (click Submit For Review) or save the page as a draft to continue later (click Save Version).
-
After you click Submit For Review, our Review Team sets to work.
We run some tests and verify your app for compliance with Setapp Guidelines. The initial review may take some time, but we will do our best to provide feedback as soon as possible. Later, when you update your app, it goes through the facilitated review process with minimum required-checks. We trust our Partners and are eager to make proven apps go live quickly.\
Submit your iOS app
Adding mobile apps differs from adding macOS apps: you don’t upload the app bundle; instead, you share the link to your app on the App Store and provide additional info.
Before submitting an app for review, follow these steps.
I. Register the iOS app in Setapp by generating the public key.
II. Integrate the Setapp Framework and the public key into the iOS app. Make sure the app interacts correctly with the Setapp system using the QR codes (see "Testing your app" for details).
III. Submit the updated iOS app to the App Store.
Ensure the app has been approved and released for the public before proceeding with Setapp.
Once done, complete providing details for your iOS app in Setapp.
-
Specify the app price on your developer account's Apps page. Pay attention to these aspects:
- The app price in Setapp should correspond to the in-app purchase price on the App Store.
- If the macOS and iOS apps are distributed with a single cross-platform subscription, the mobile app must have the same price (and get the same price tier in Setapp) as its macOS companion app.
-
Add release comments for the Setapp Review Team (if necessary).
-
Submit the app for review.
Your iOS app goes live in Setapp after the Review Team approves its price and completes the routine review process.
Submit your web app
After you’ve completed the integration with the Vendor API, please provide us with your app’s landing page that directs users to the Setapp Authorization Request URL. You can share this page with your developer relations representative or email it to us at [email protected].
Next, visit the Apps section in your developer account, and enter your web app’s information in the designated section for your web app.
Note
You do not need to upload app builds or submit a version for review.
Once you’ve submitted all the required information, our team will handle the rest
Updated 7 days ago